

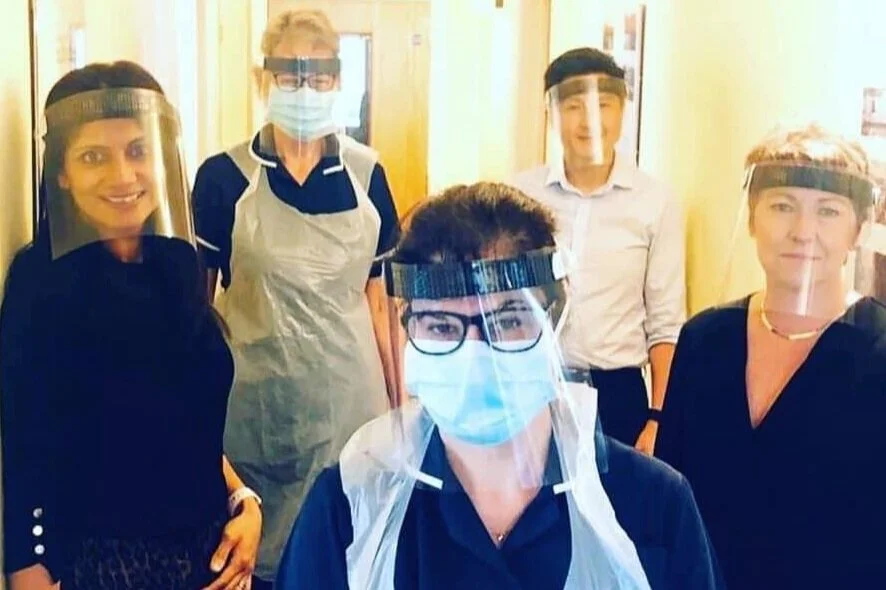
We are all pulling together and talking together about how we are feeling both IRL and online and caring for each other during this difficult time, which is the way it should be! The most vulnerable in society need our help and those who working in key worker jobs need our love and encouragement to do the best jobs they can. My beautiful friend Serena is on a crusade, and our little family is more than happy to join her and help out our wonderful NHS!
We couldn’t be prouder of the way the community and the whole UK has pulled together and started caring and working together without a second thought! Front line staff, medics, care home staff, NHS doctors surgeries and pharmacists are all in desperate need of PPE, especially local teams, so to join Serena who started making her own visors to take to local hospitals and we thought as we were making them, we could put together a DIY ‘instructable’ to show you how to make them too. It’s pretty simple and they really are in need, you can make these with your kids or your parents - get your household can get involved!
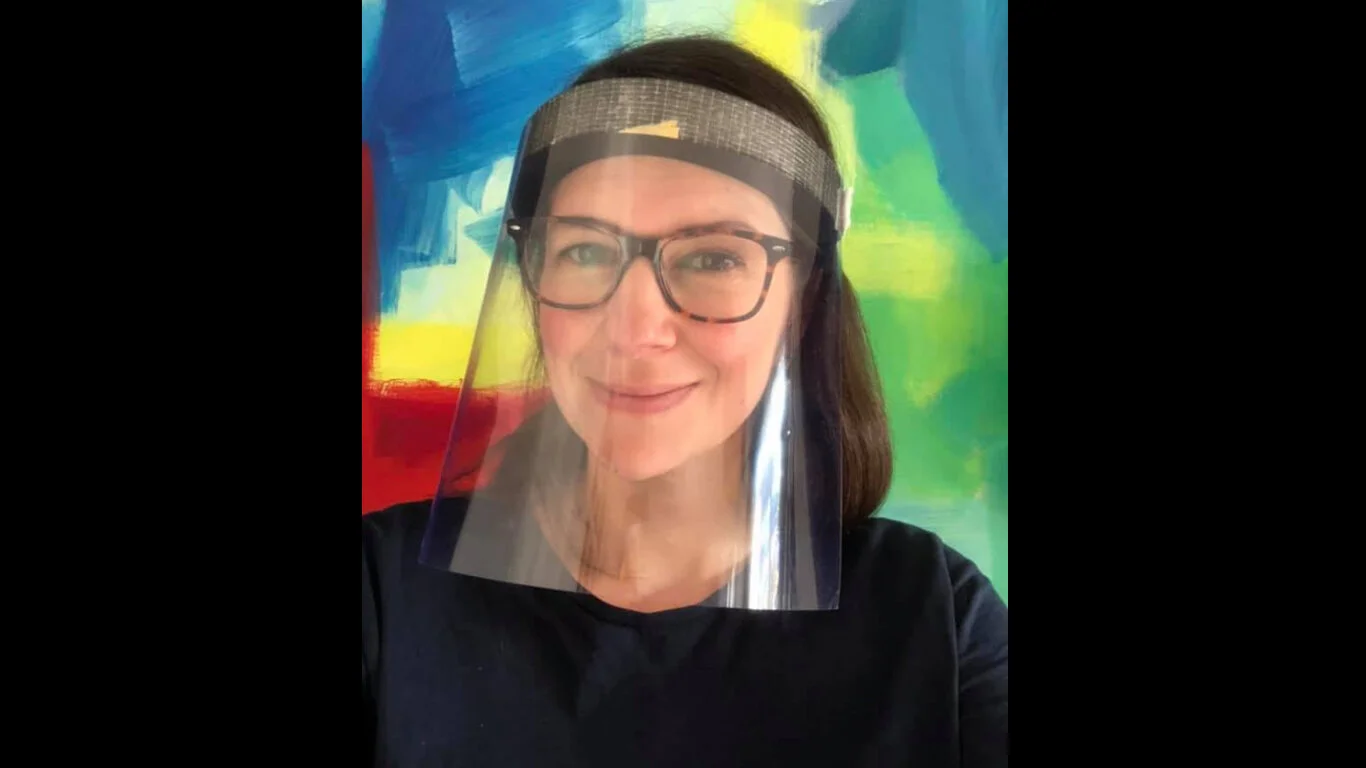
DIY VISORS FOR FRONT LINERS
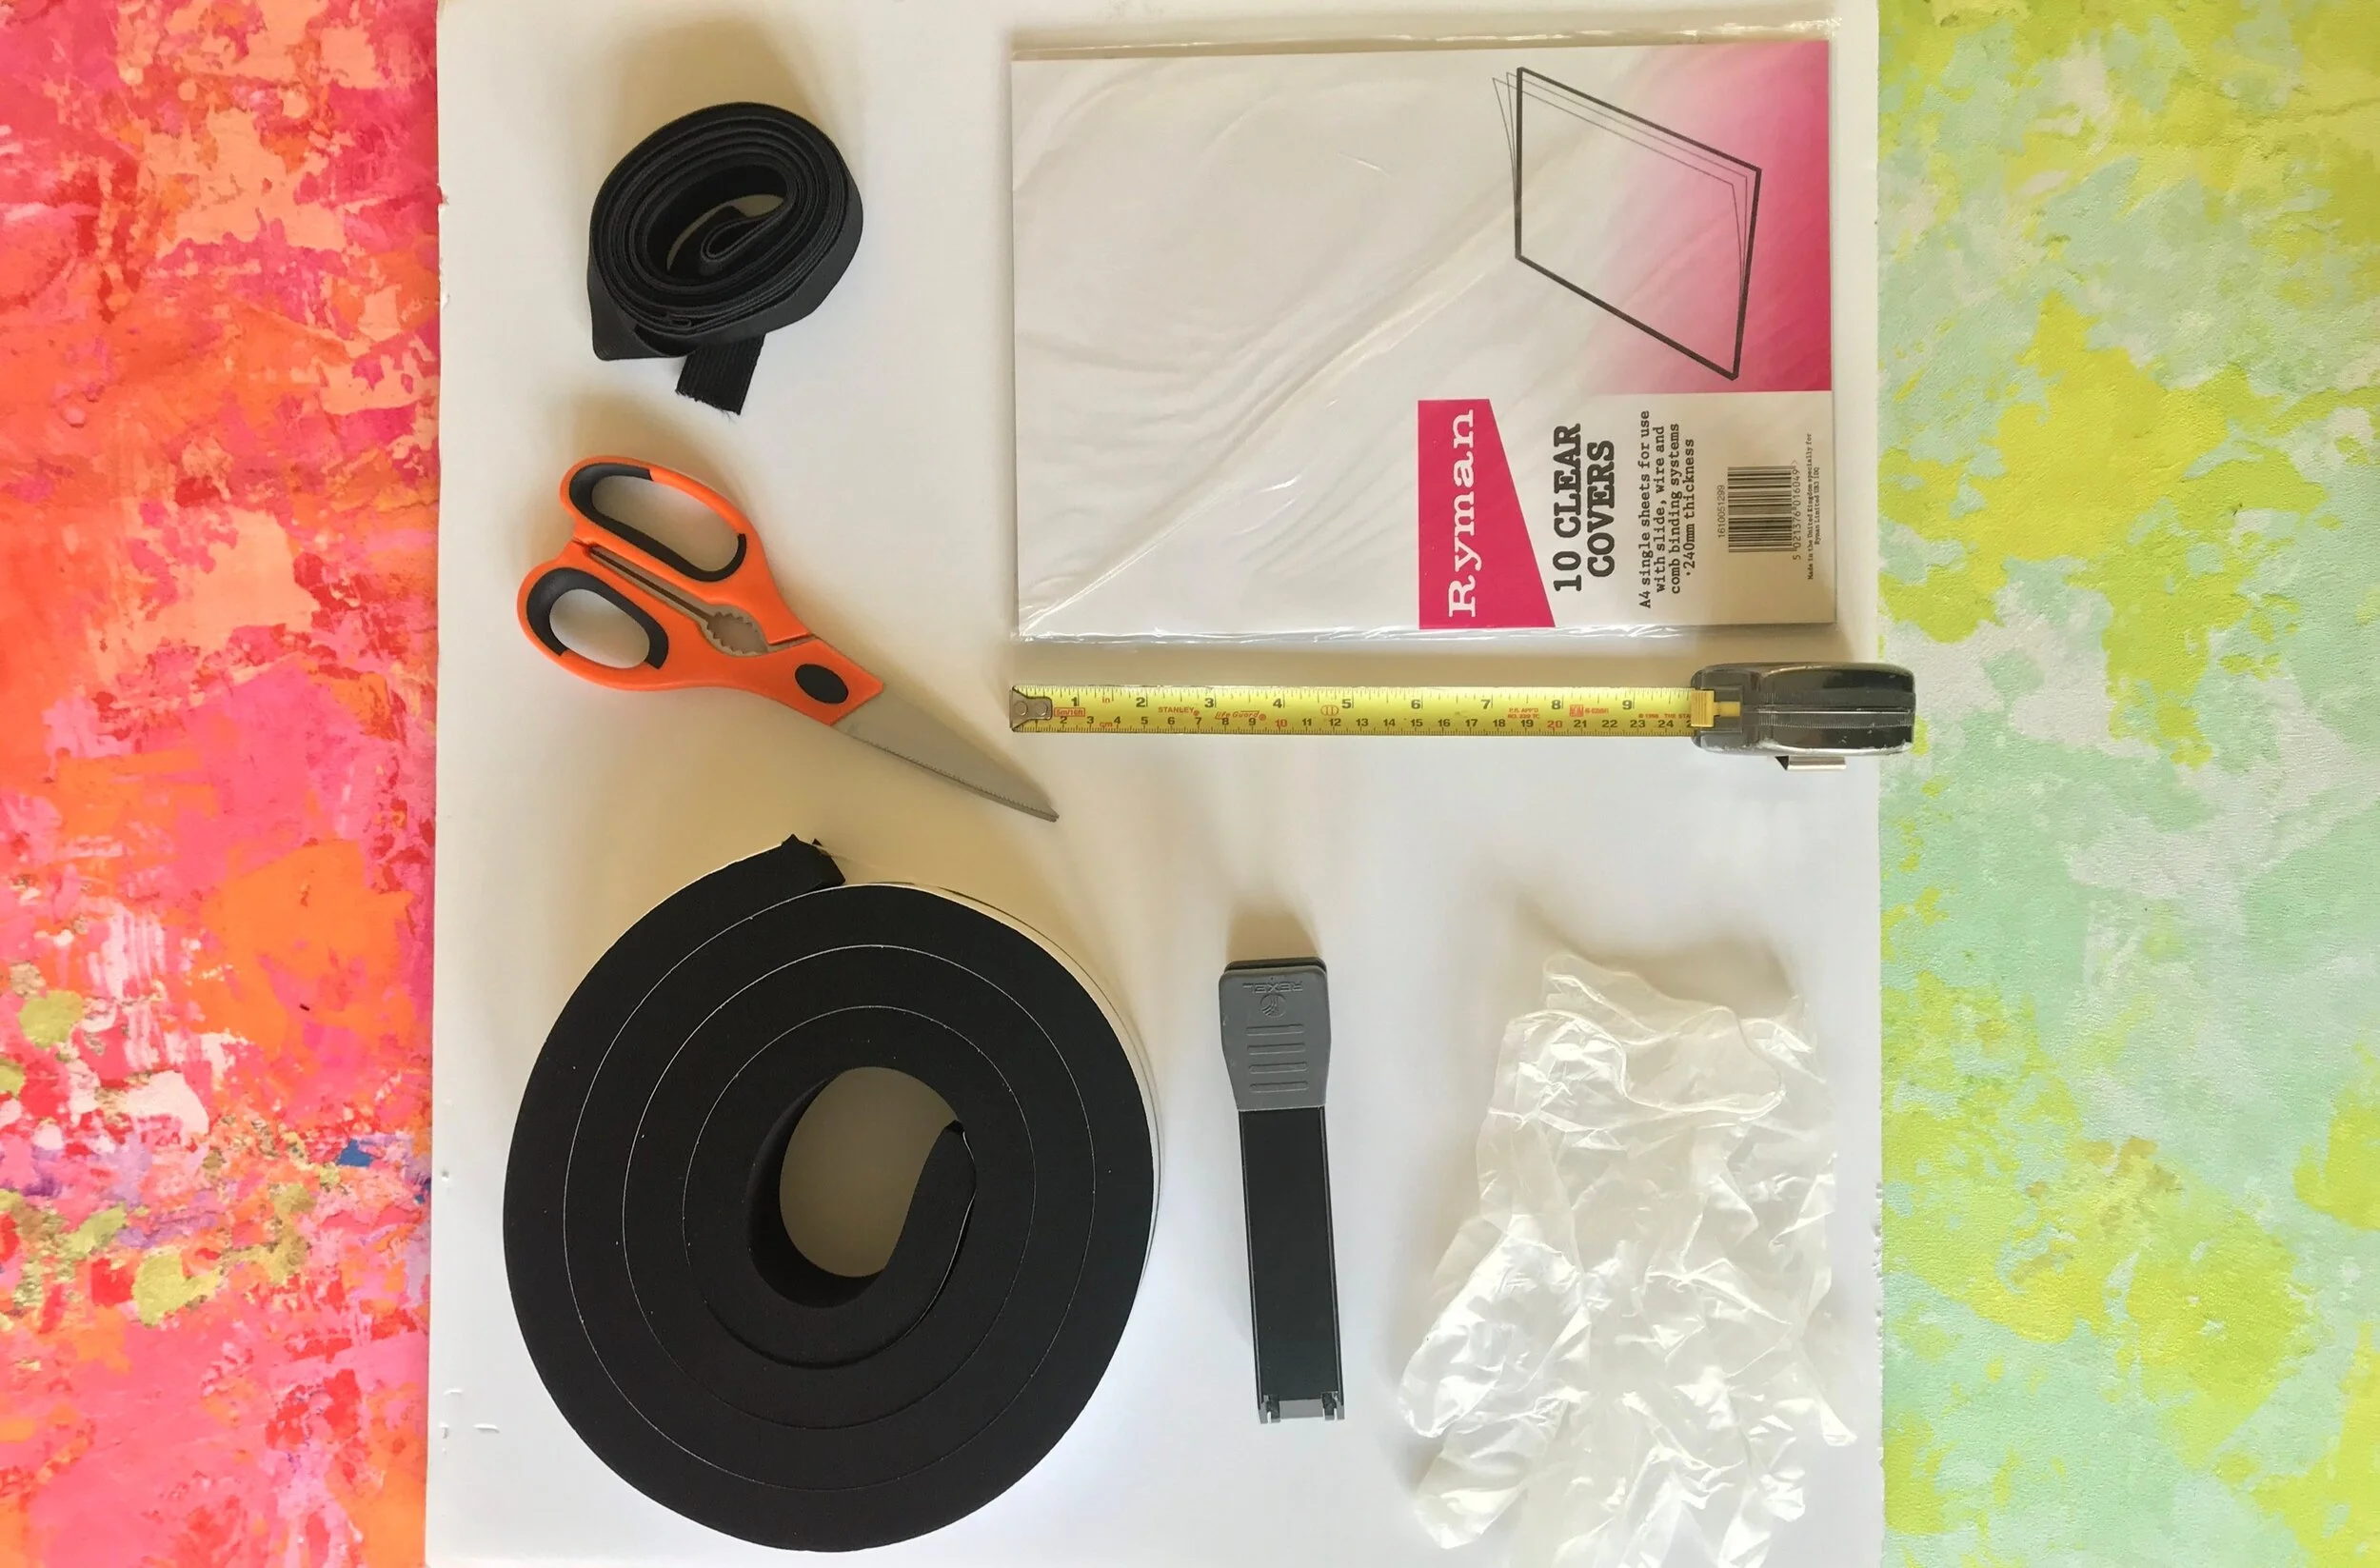
STEP 1 - GETTING THE PARTS
There are a few components to a visor and most can be ordered on Amazon or you may have some of the bits around the house!
Foam Tape - This can be tricky to get hold of at the moment, as people are making visors, which makes me pleased, so keep an eye out! The foam should be roughly 25 mm x 20 mm thick, you can order from DIY shops, you may have some for DIY at home and Amazon.
Acetate Covers - Ideally around 200 micron, can be heavier or lighter - usually used for covering presentations or booklets in stationary, so Ryman’s or Amazon.
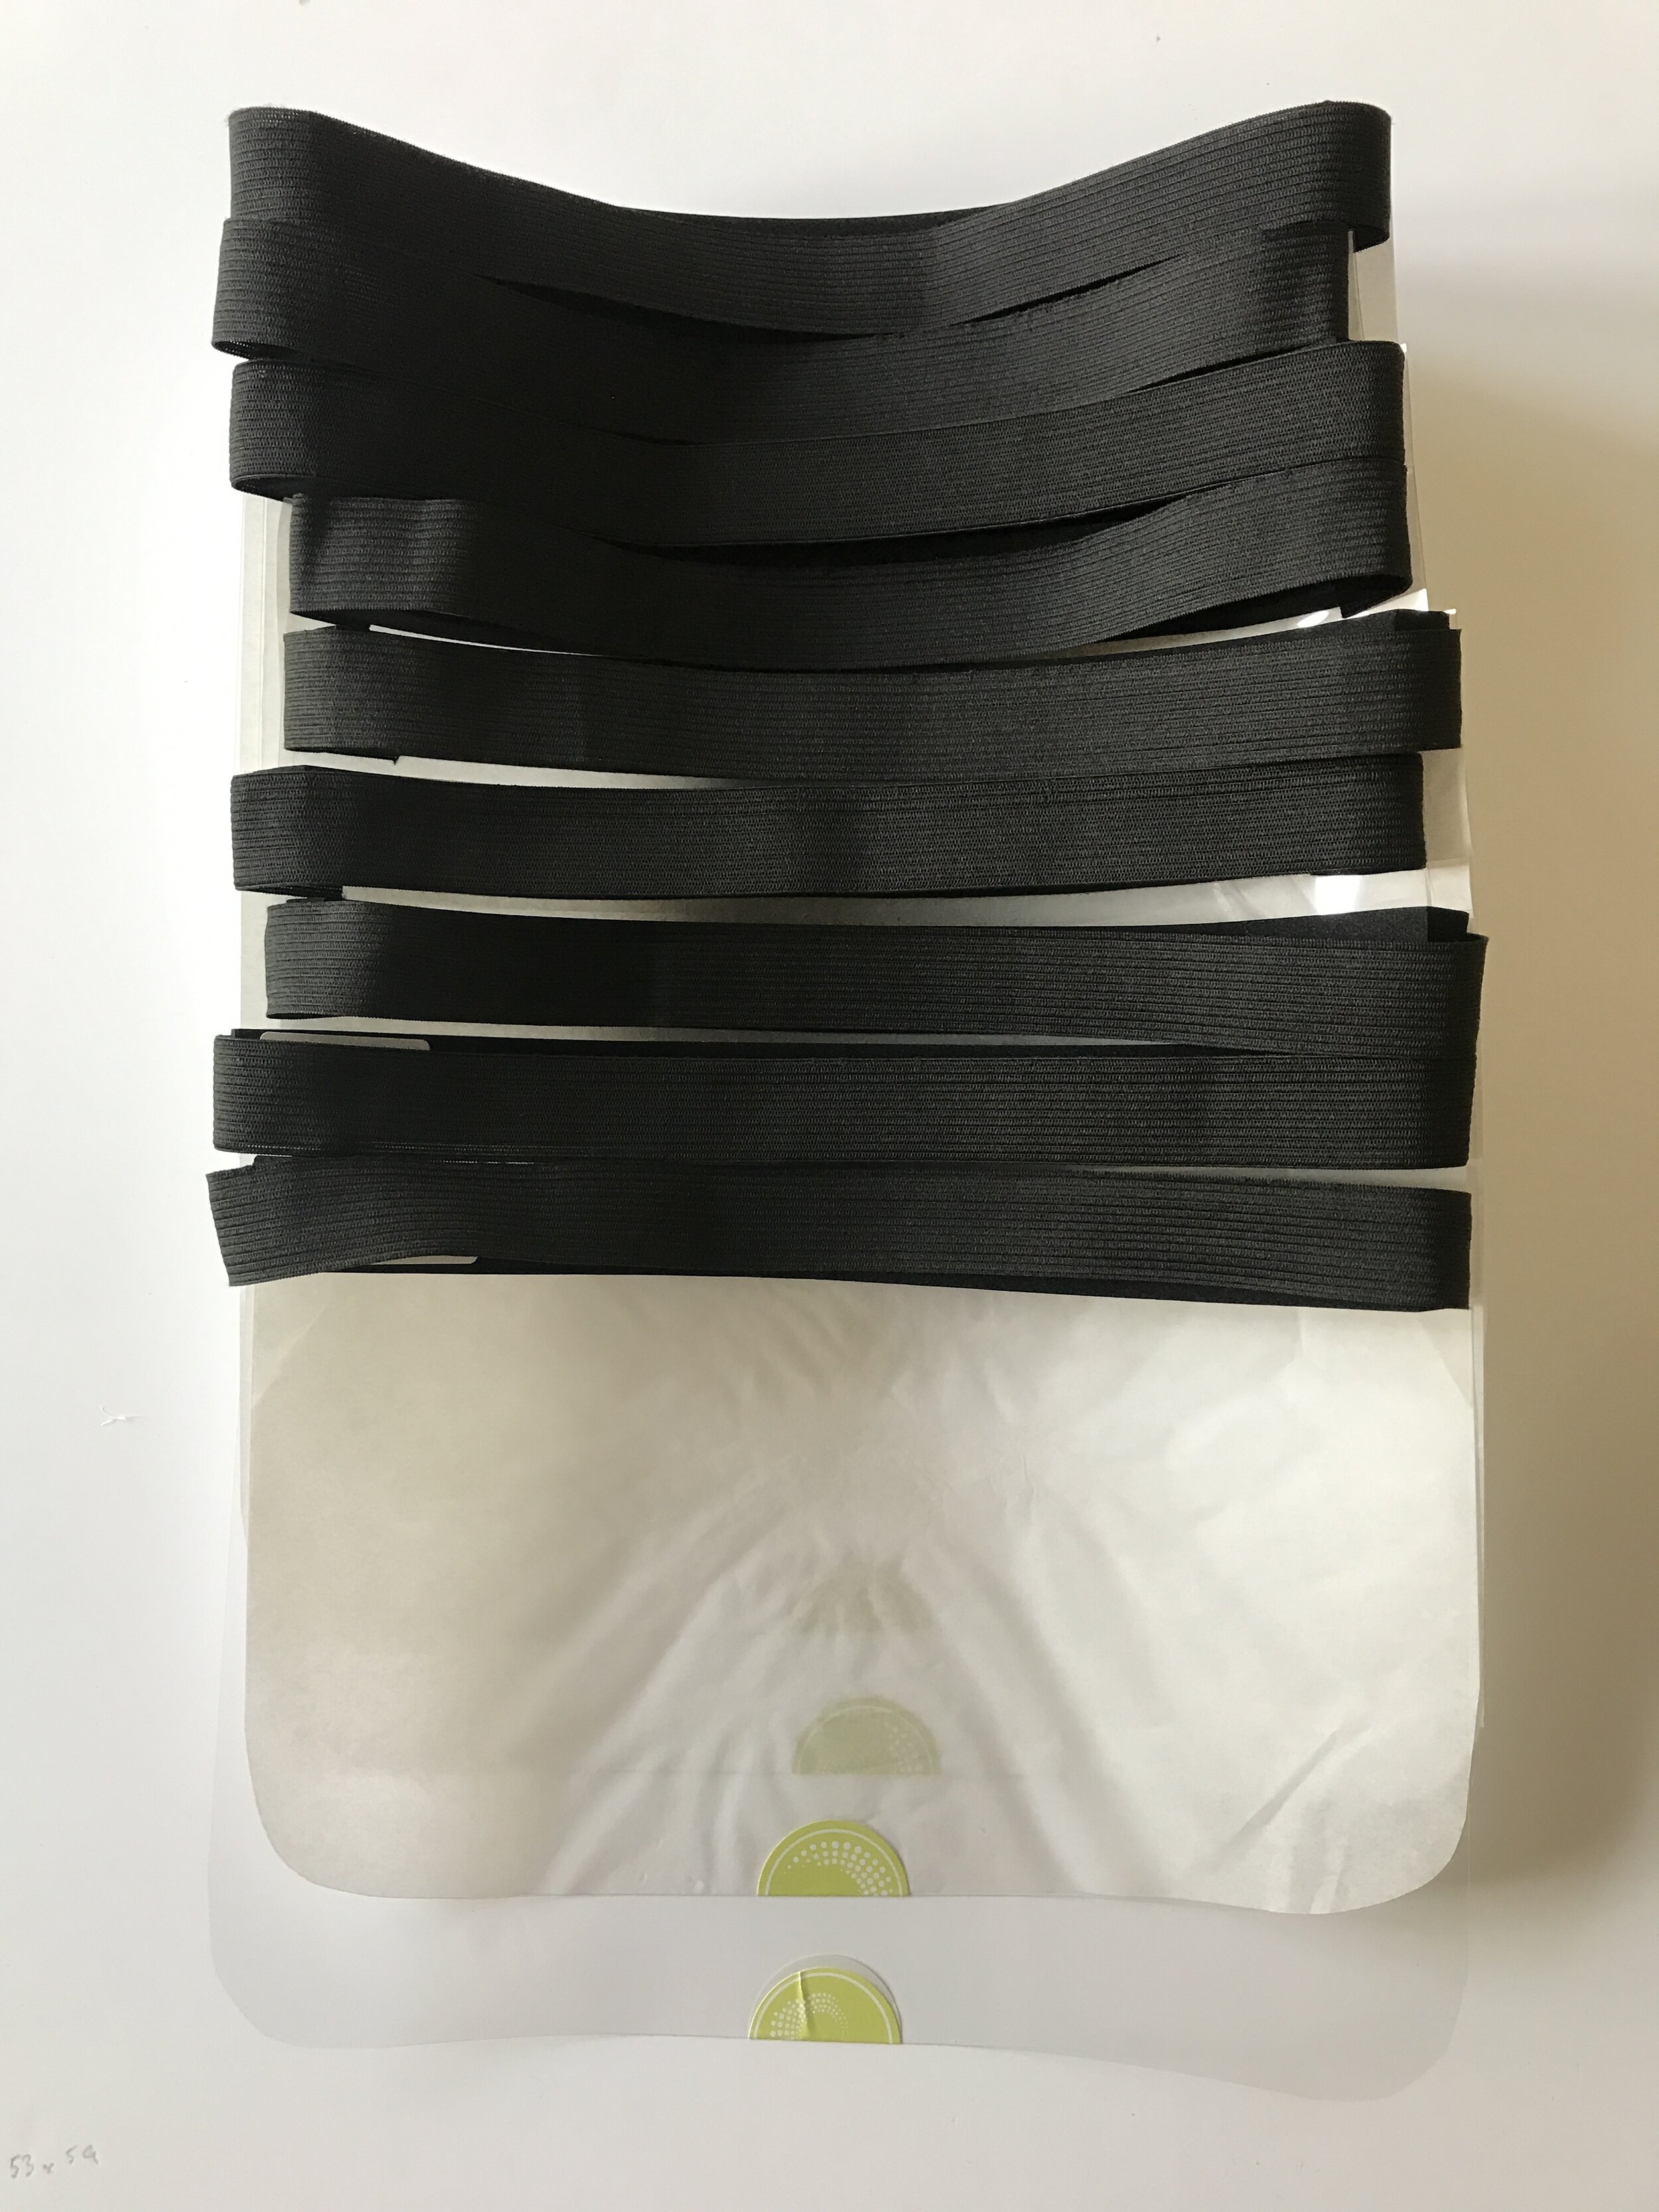
Elastic - We chose a wider elastic (25 mm) to support the visor, though a thinner one would work as well if you have that in your sewing kit!
Disposable Gloves - Now I haven’t been able to find an eco friendly version of these, we happened to have these in the house for medical reasons, so you may have some too.
Stapler, Scissors and Tape Measure.
STEP 2 - PREPARE THE LENGTHS
-
Always wear gloves for protection when preparing any visors.
-
The Foam can be cut into 30 cms lengths ready to be stuck
-
The Elastic, you can check around your own head, we tested in the family and went for 37 cms as the magic number to cut flat.
-
Round the corners of your acetate sheets on one long side - this can be done whilst you are making them - or to save time pre-cut, just one side on the long length - you can see below.

CUT ROUND EDGES ON ONE LONG SIDE
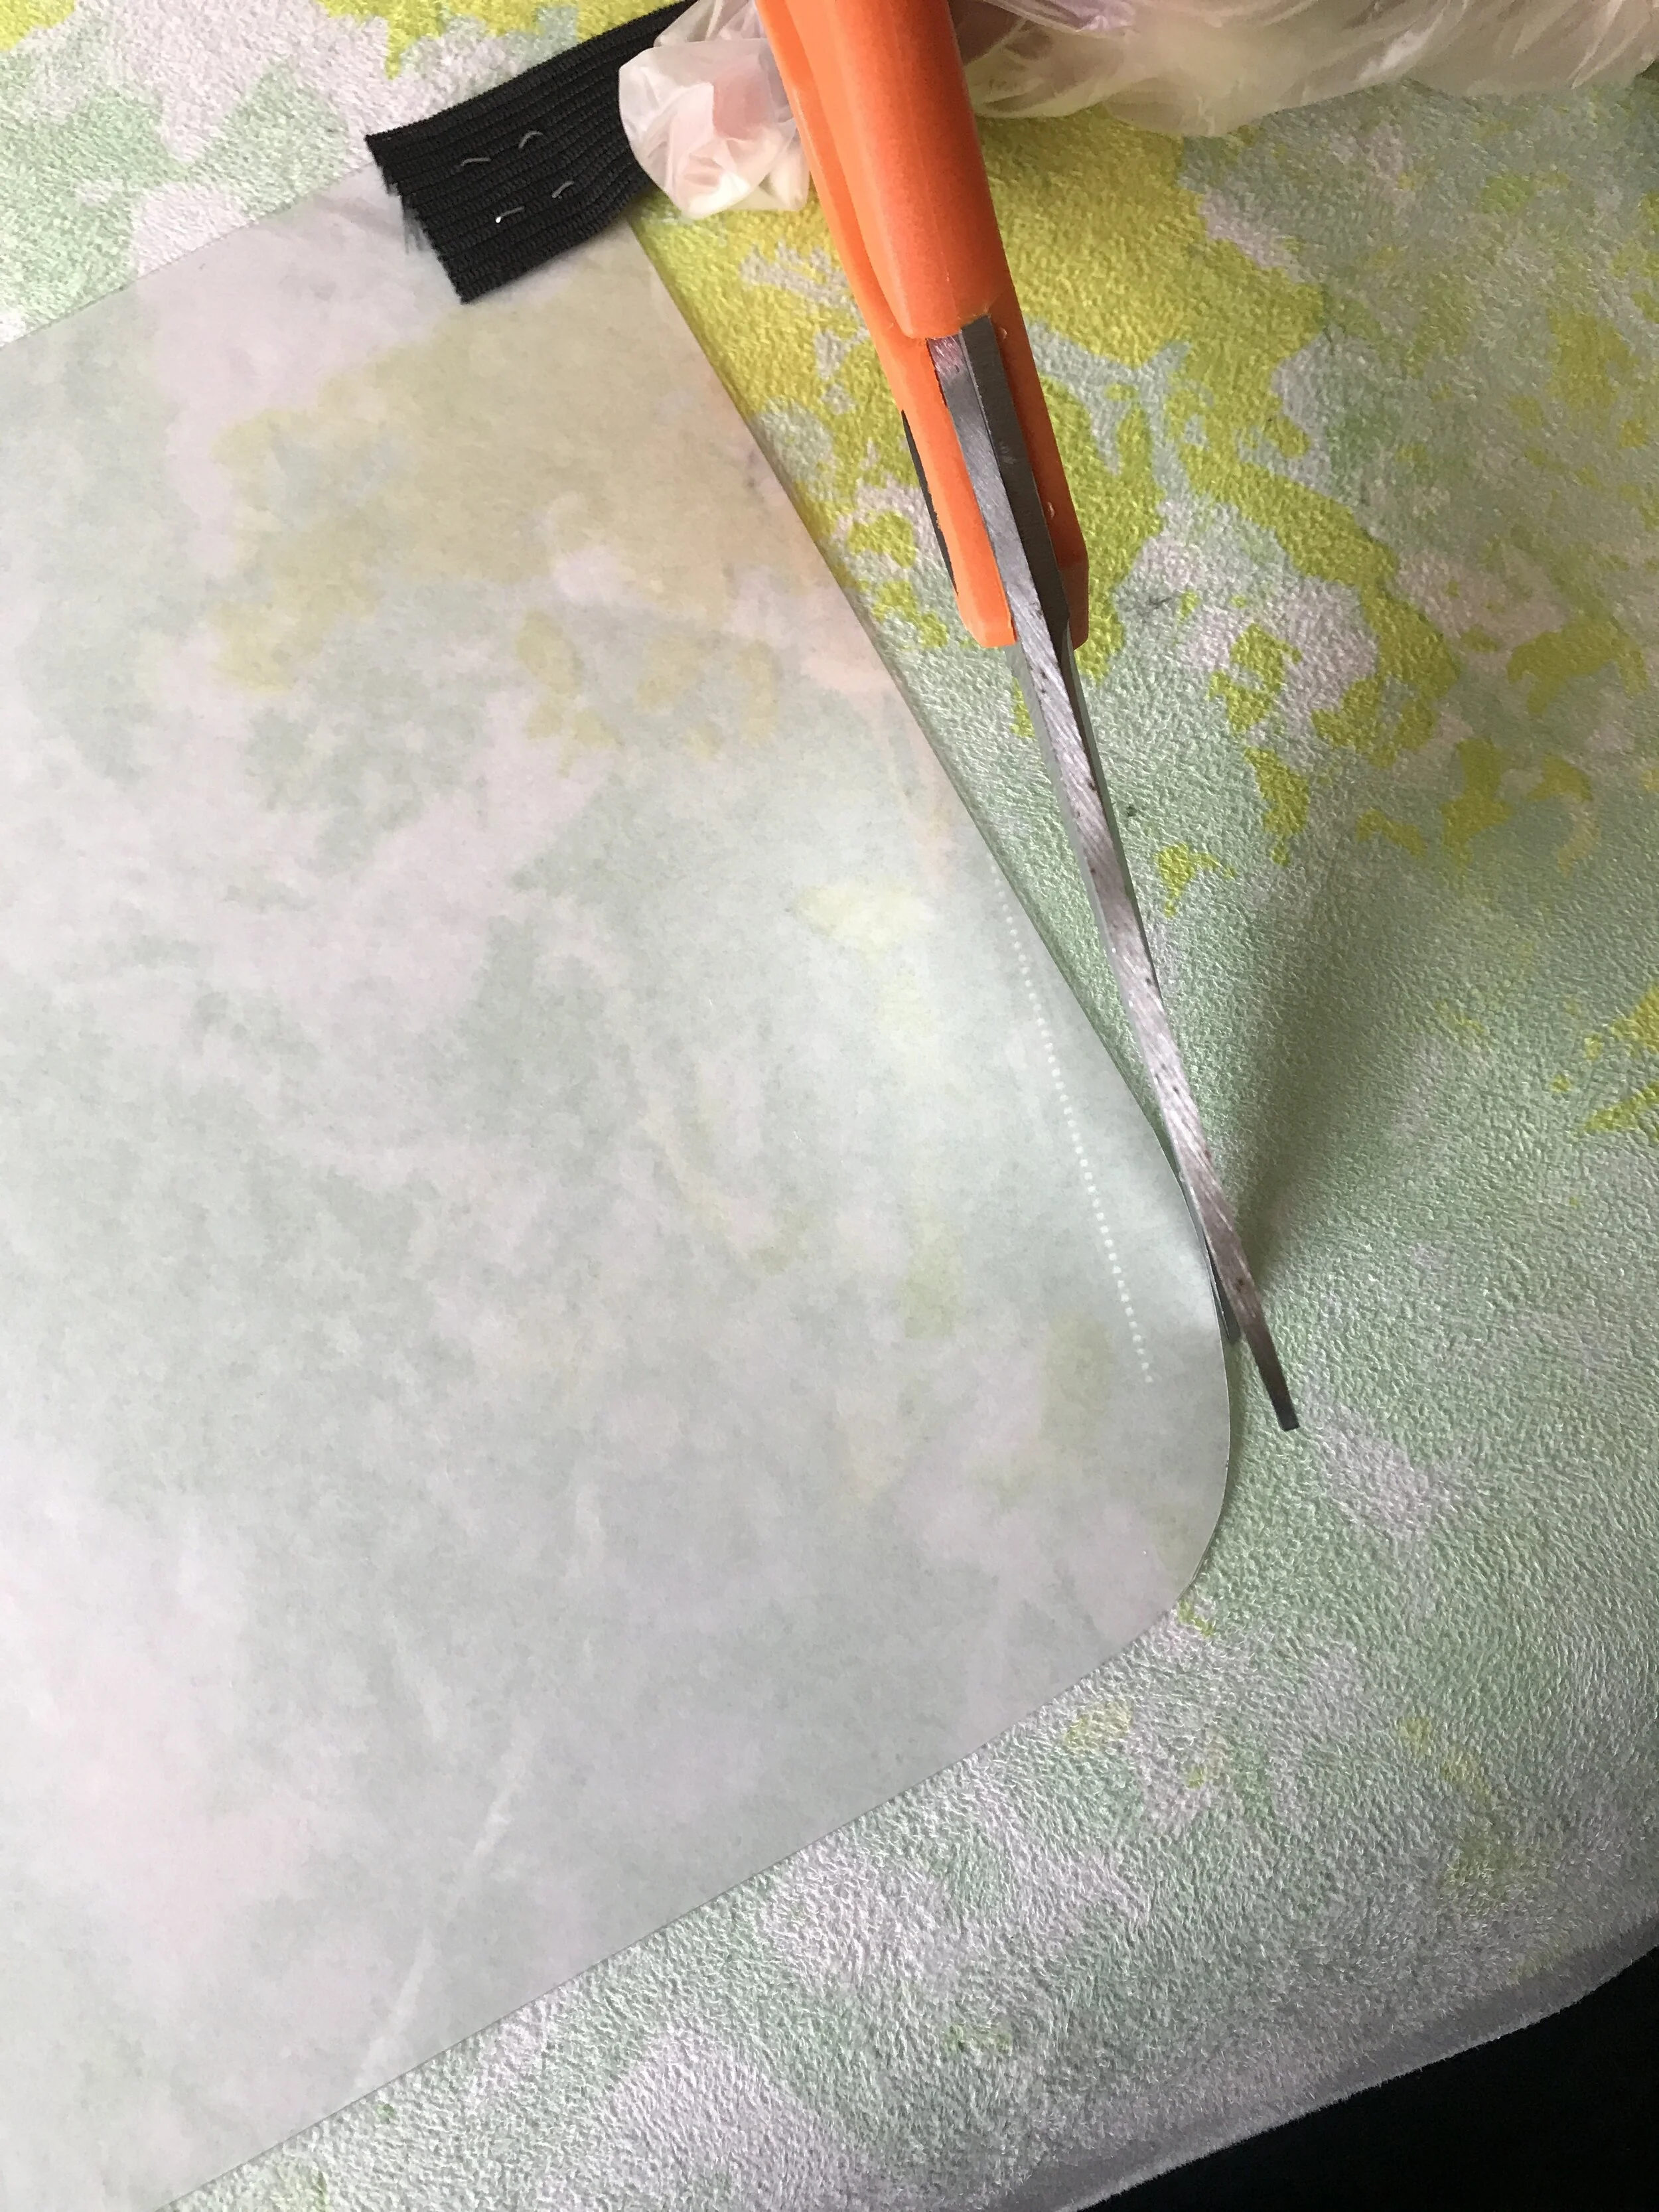
ROUND OFF THE EDGES
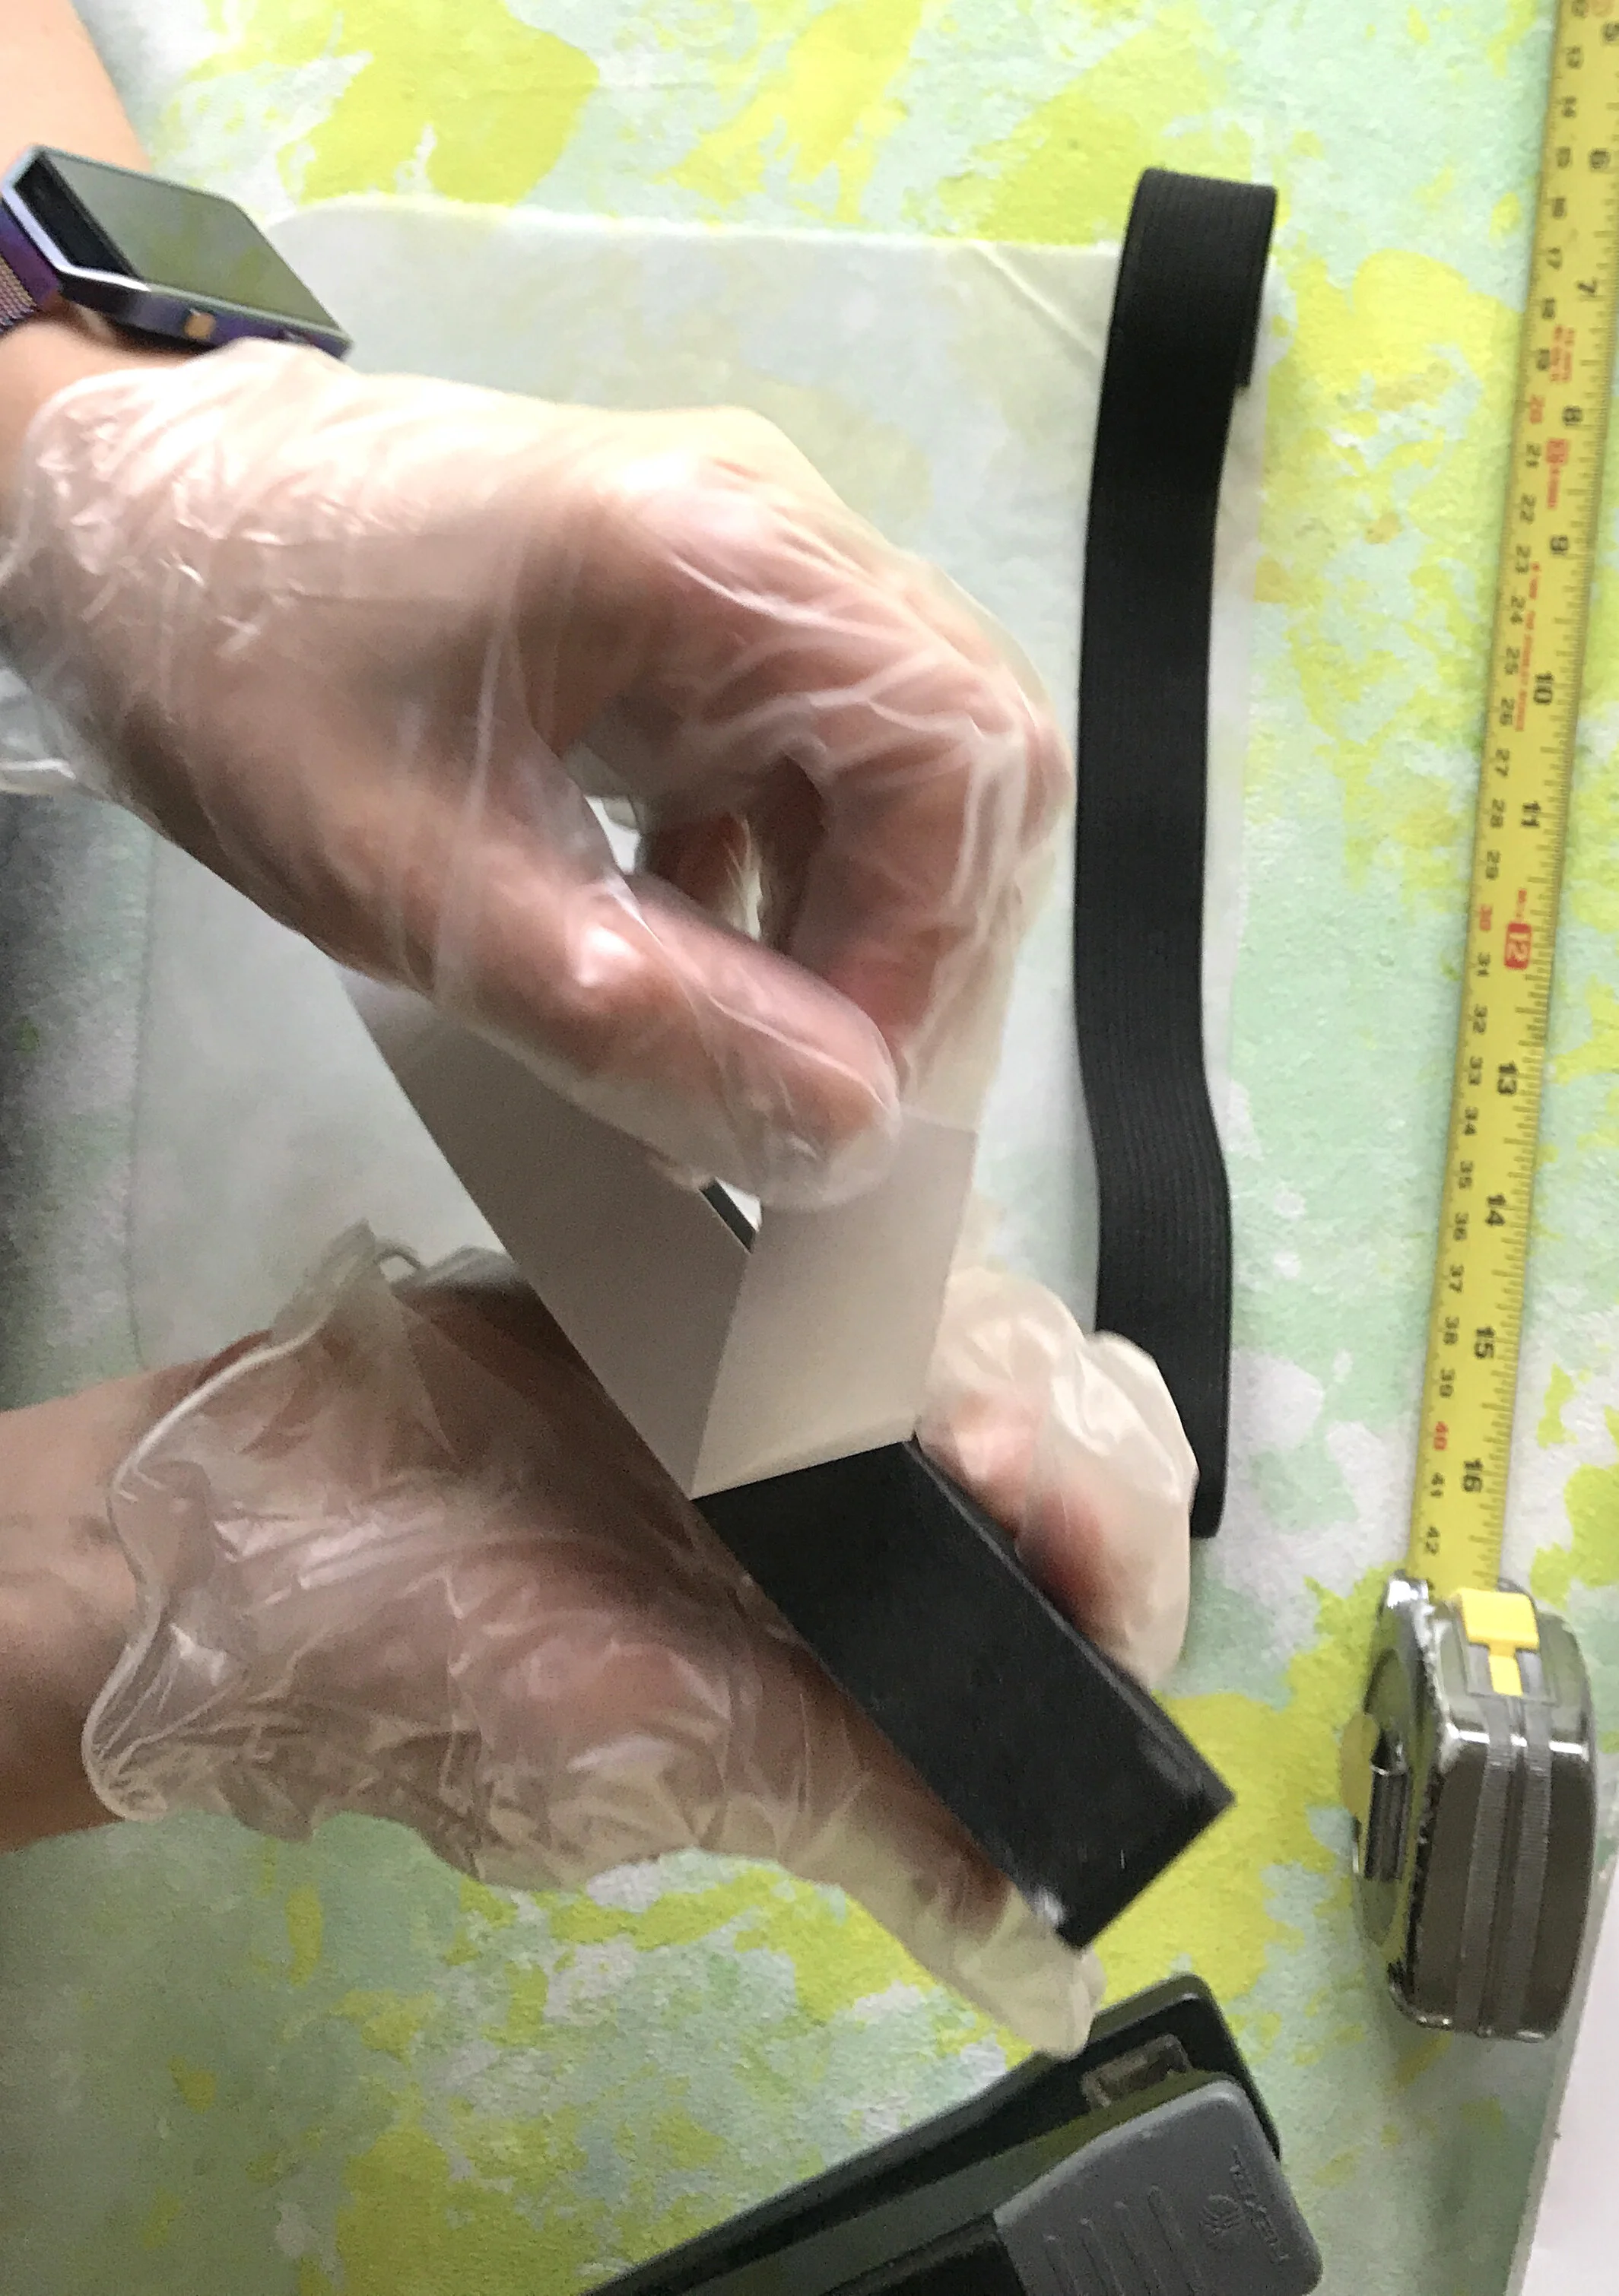
STEP 3 - PRODUCTION
-
Firstly, staple the elastic to the acetate sheets, on each side of the visor. You want the back of the staples to be the inside of the mask and so this is a little fiddly but once you get the hand of it - you’ll be flying!
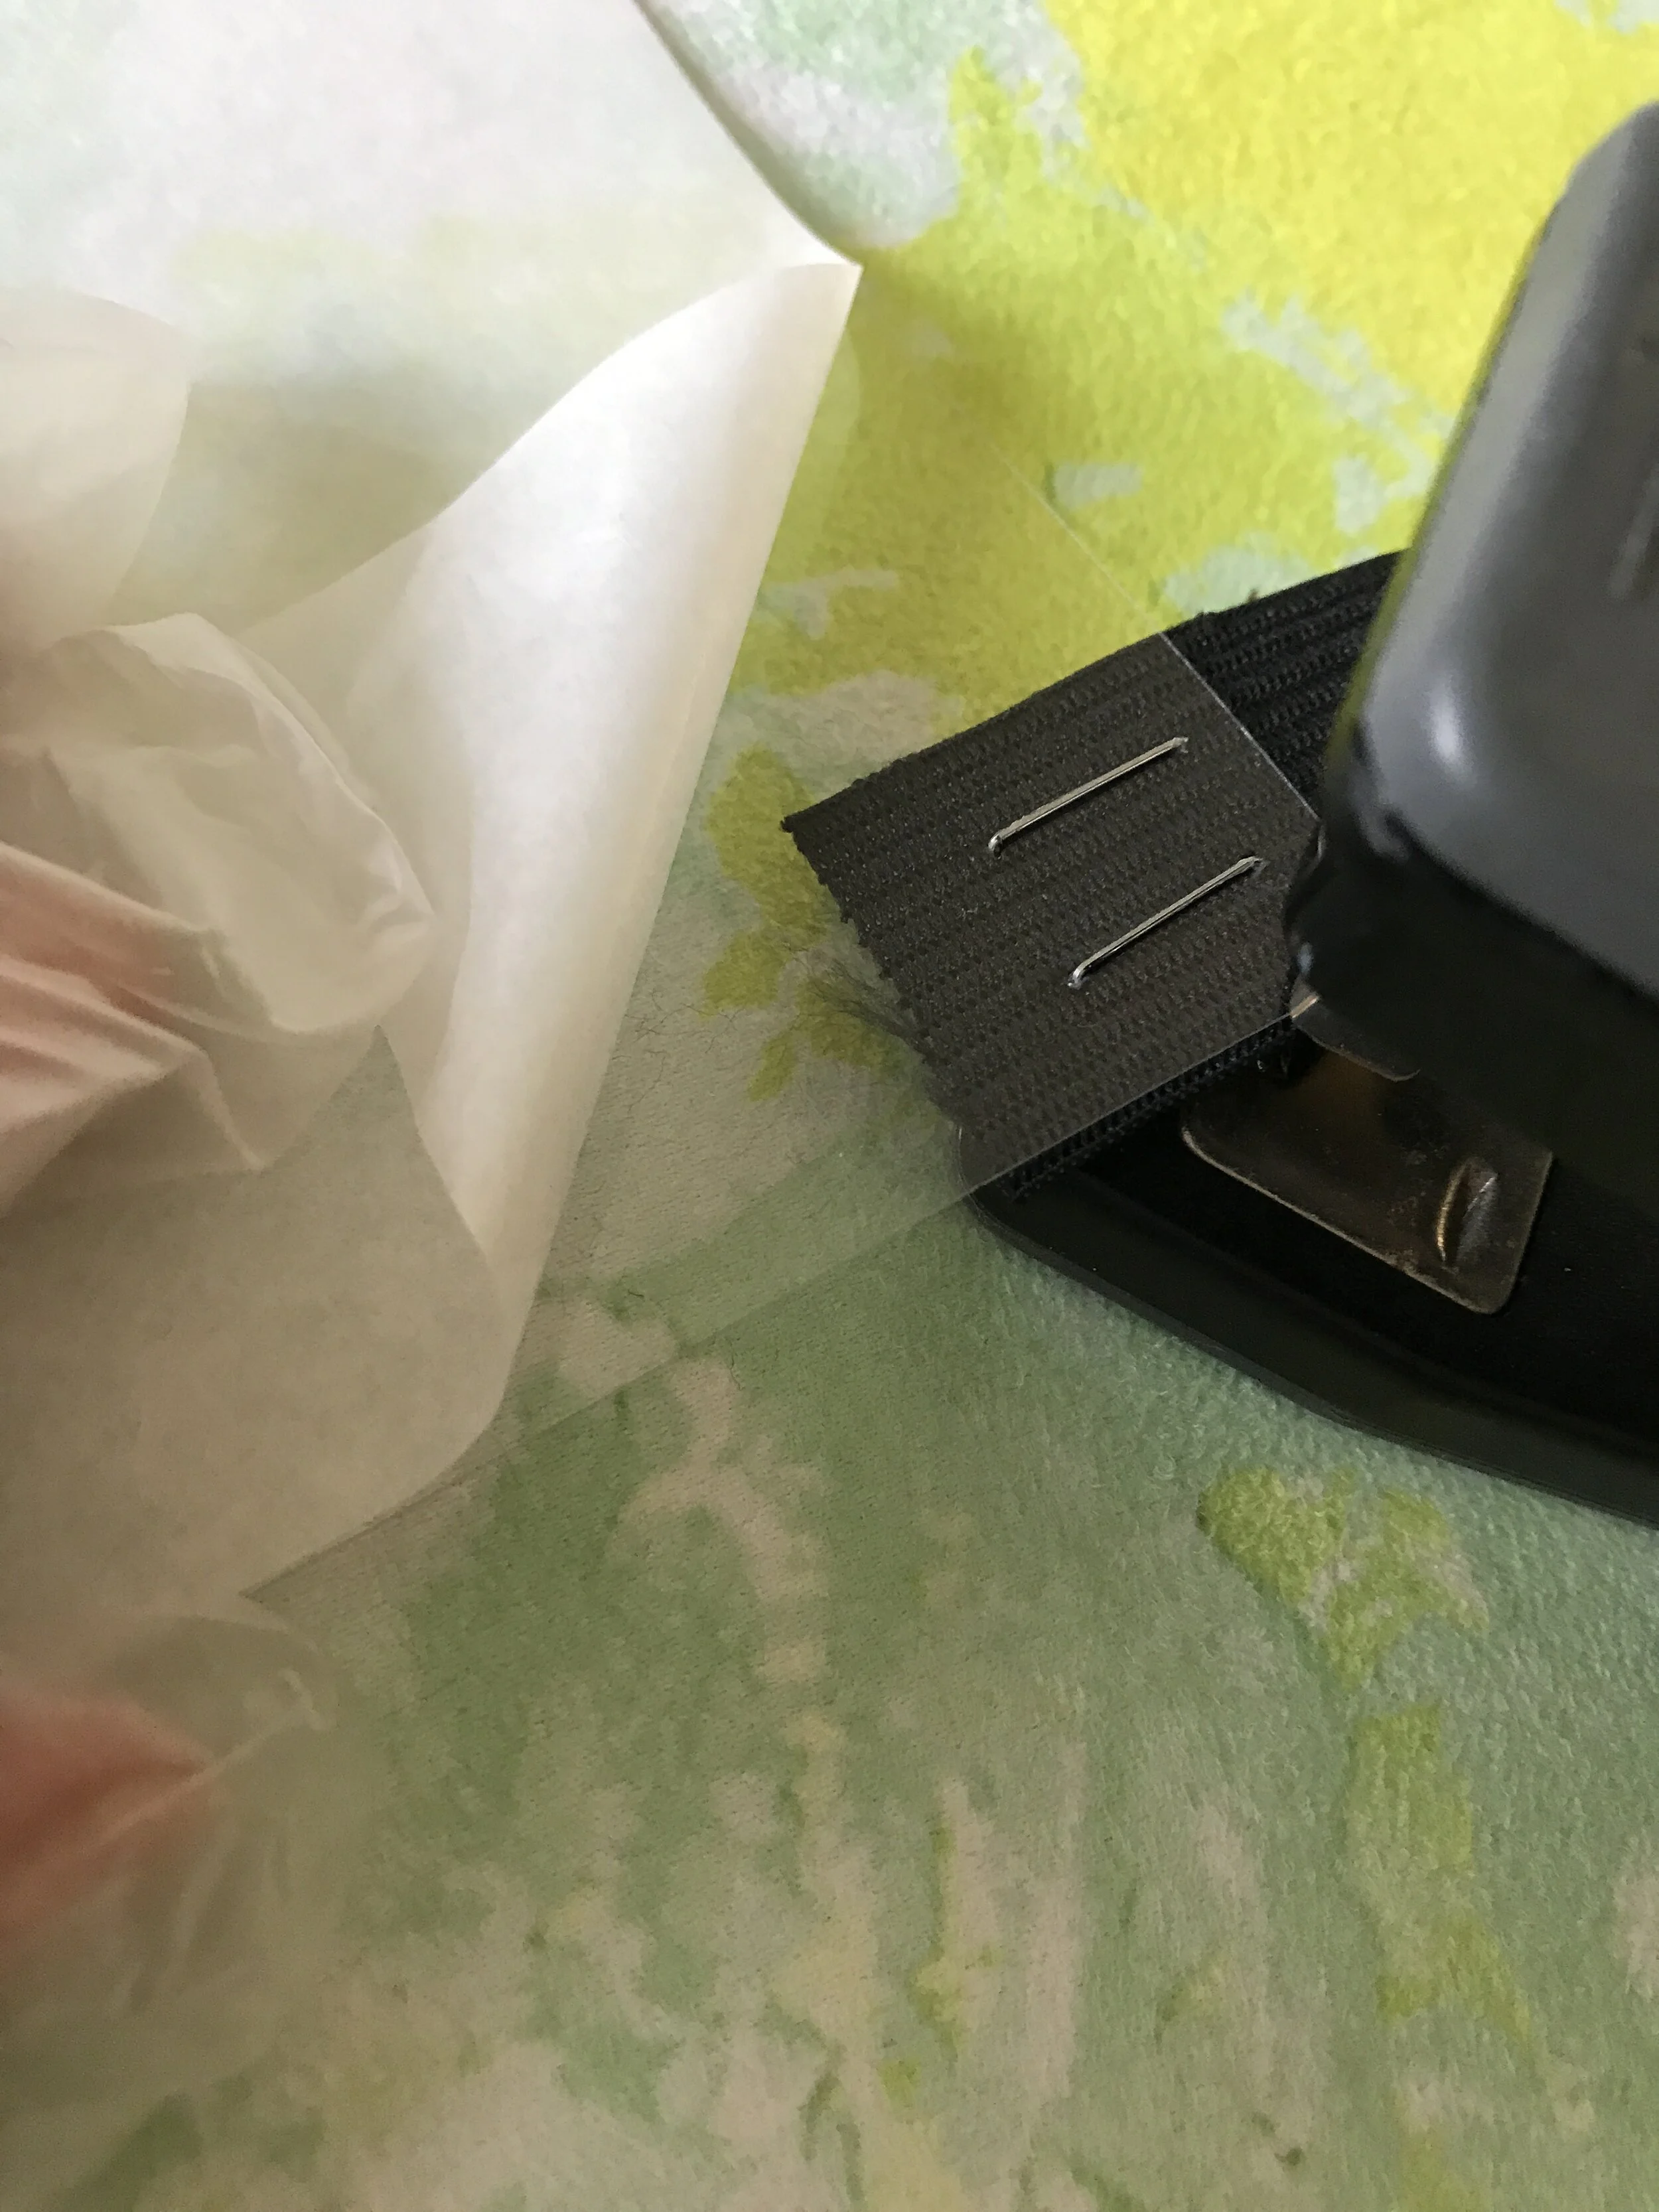
STAPLE ELASTIC TO EITHER SIDE OF VISOR
-
Next, once both sides have been secured you can peel back the adhesive strip on the foam tape which you have cut to lengths ready and stick them to the visor edge, making sure to cover the staple ends on each side and leave a thin strip clear above (3 mm or so, roughly), just so the glue on the back of the foam is always on the acetate and won’t get stuck to your hair!
PEEL BACK STRIP WITH ADHESIVE ON FOAM TAPE

PLACE FOAM STRIP OVER STAPLES AND ELASTIC ON EDGE - TO COVER WHOLE EDGE
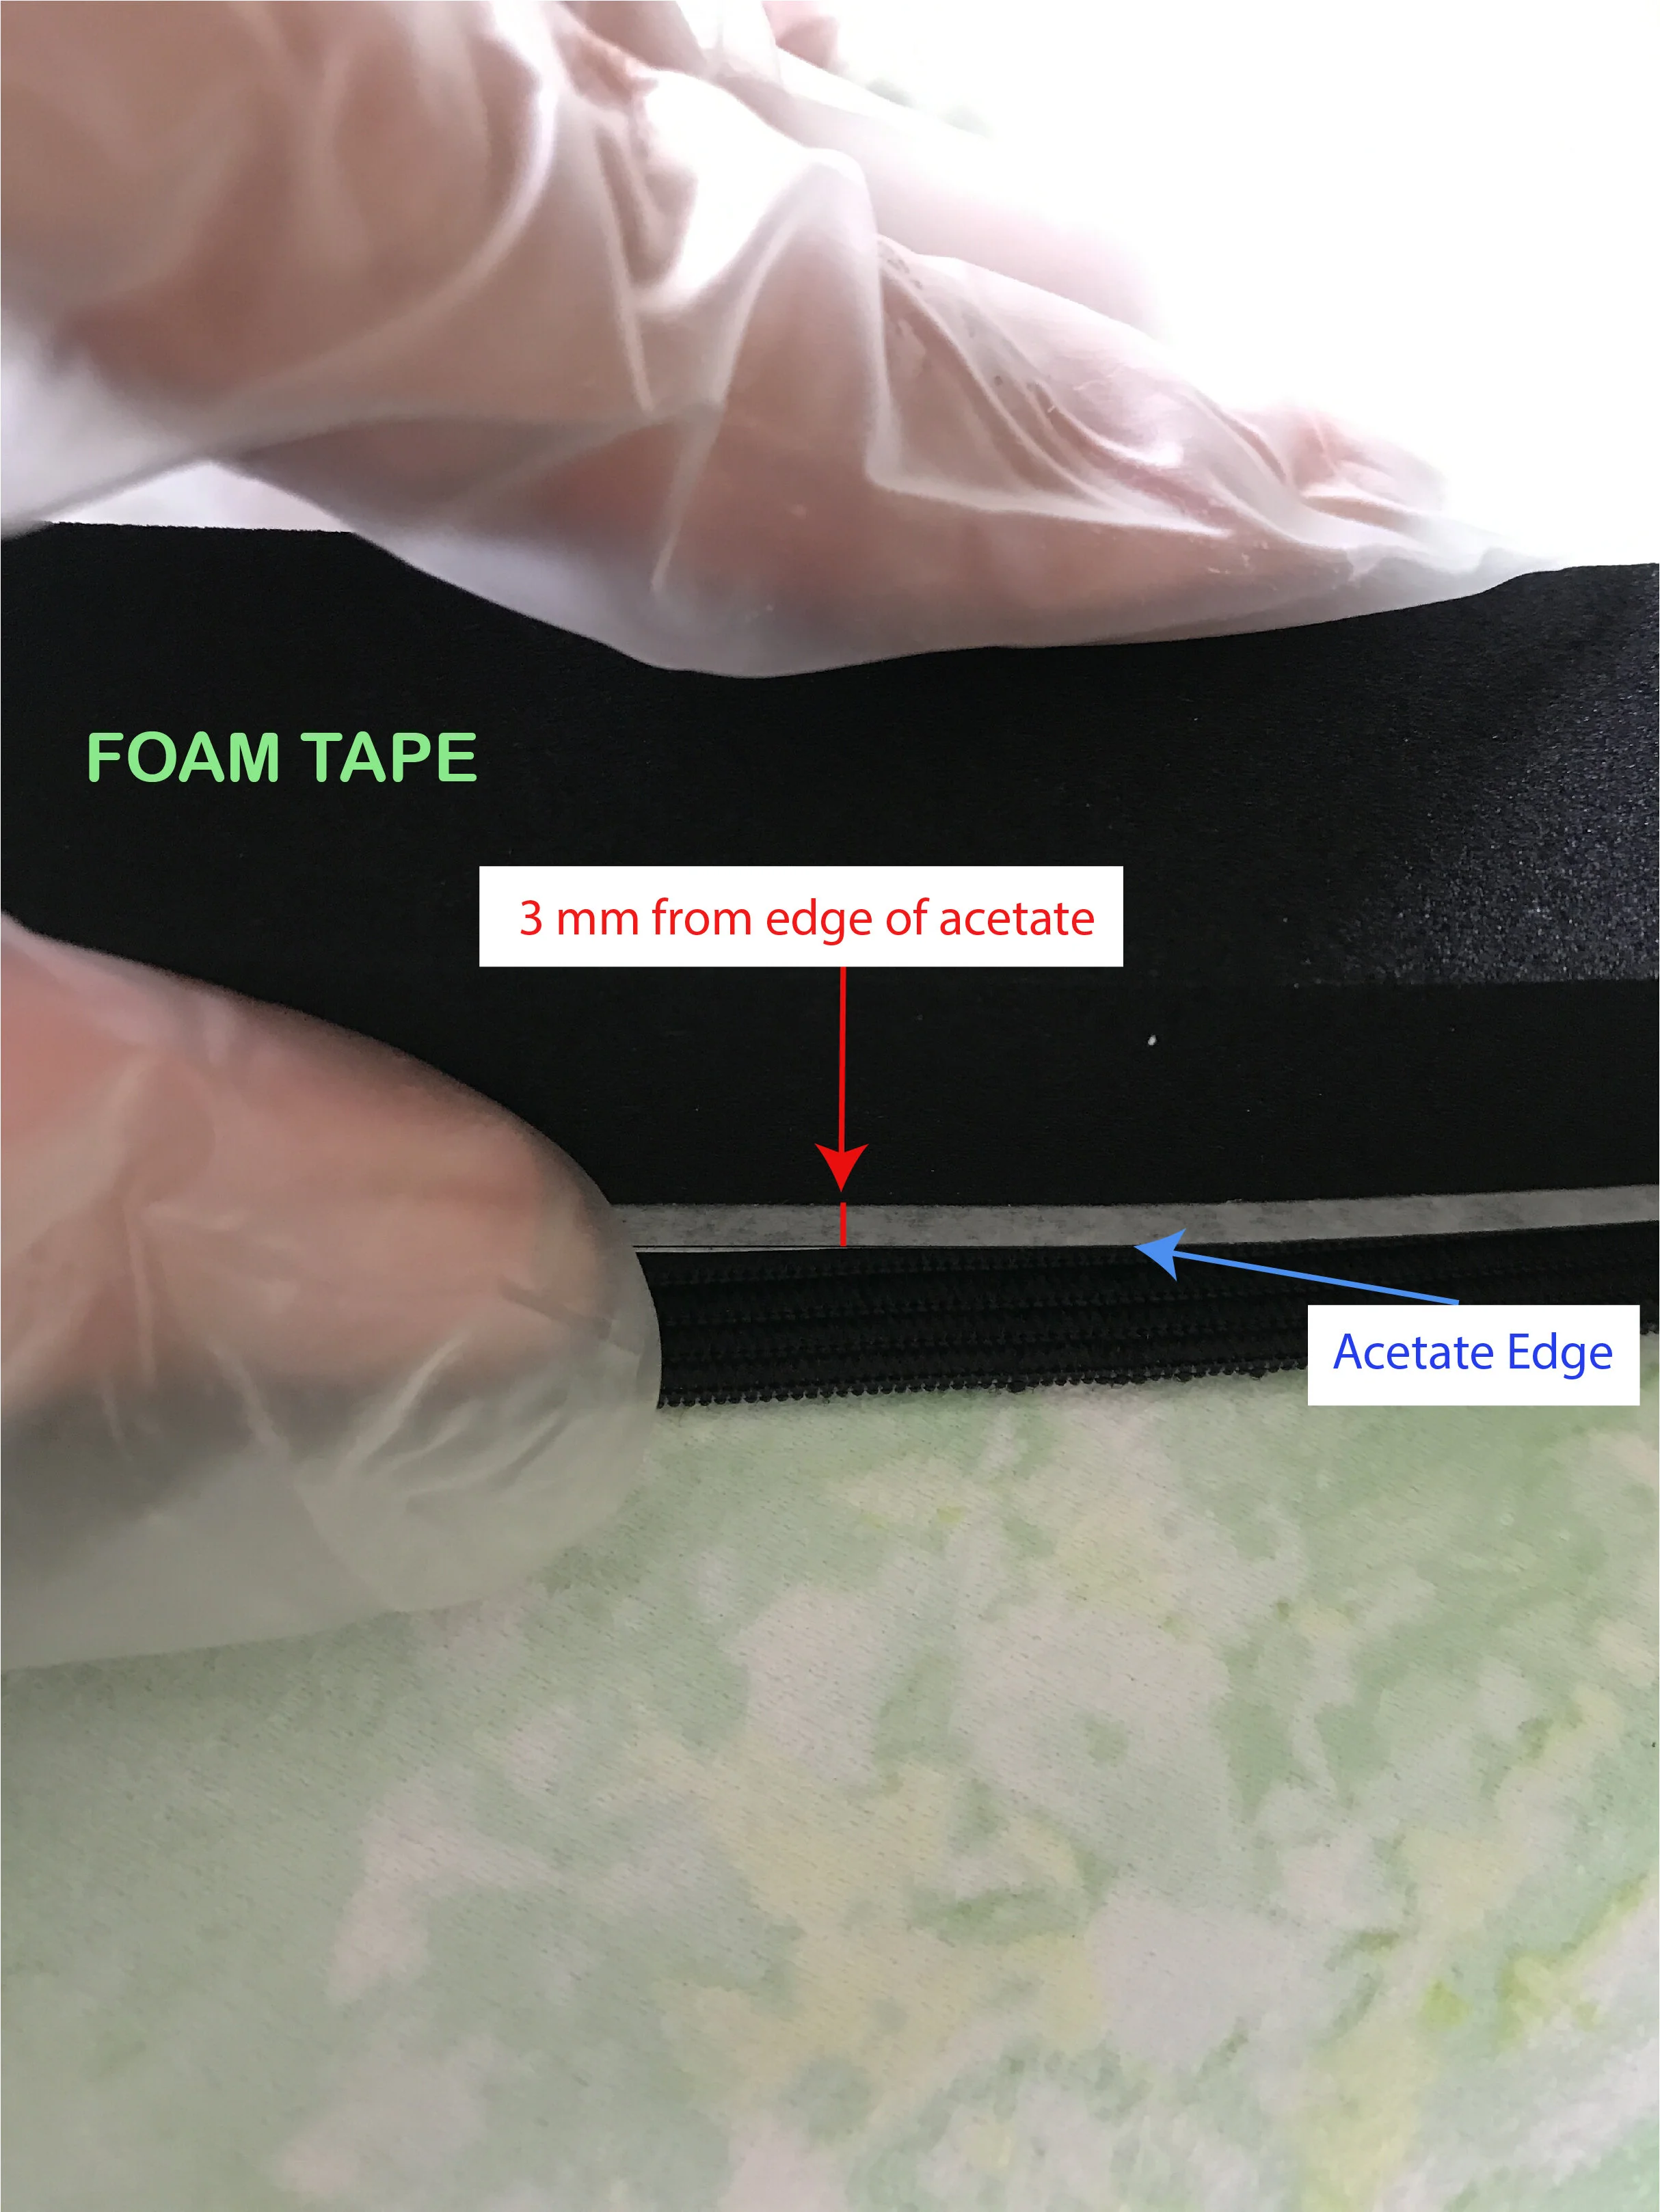
FOAM TAPE PLACEMENT
-
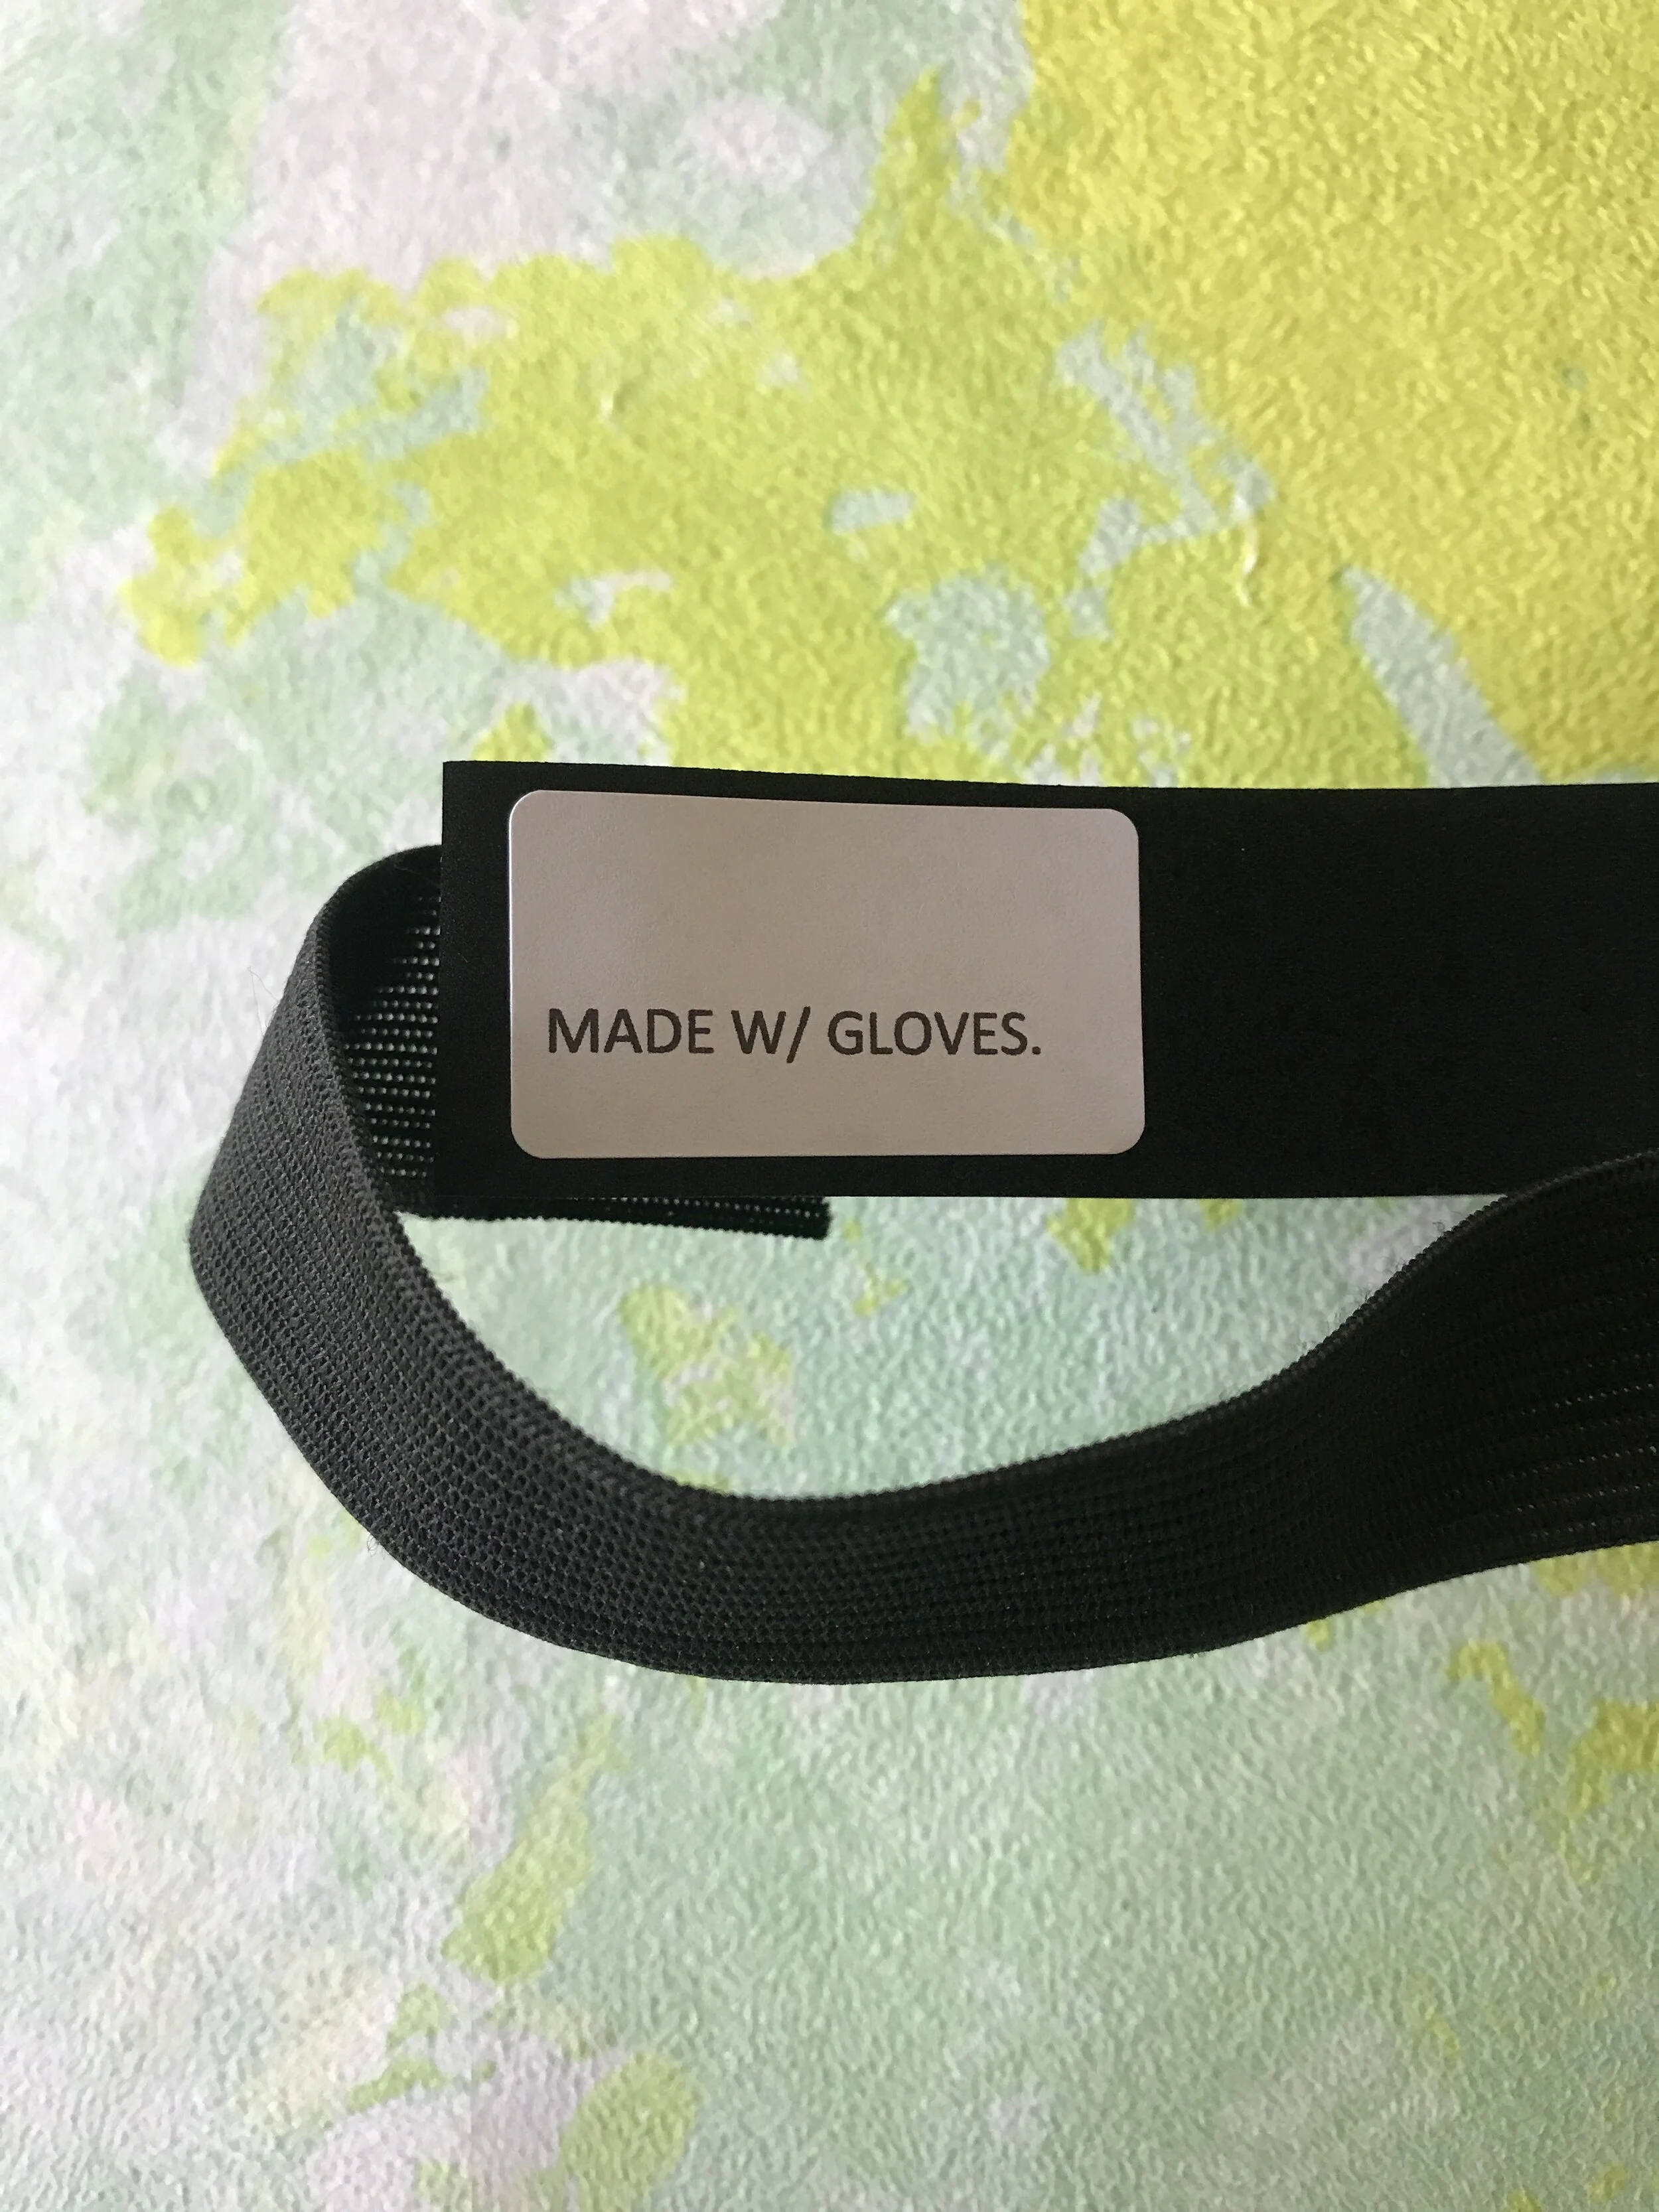
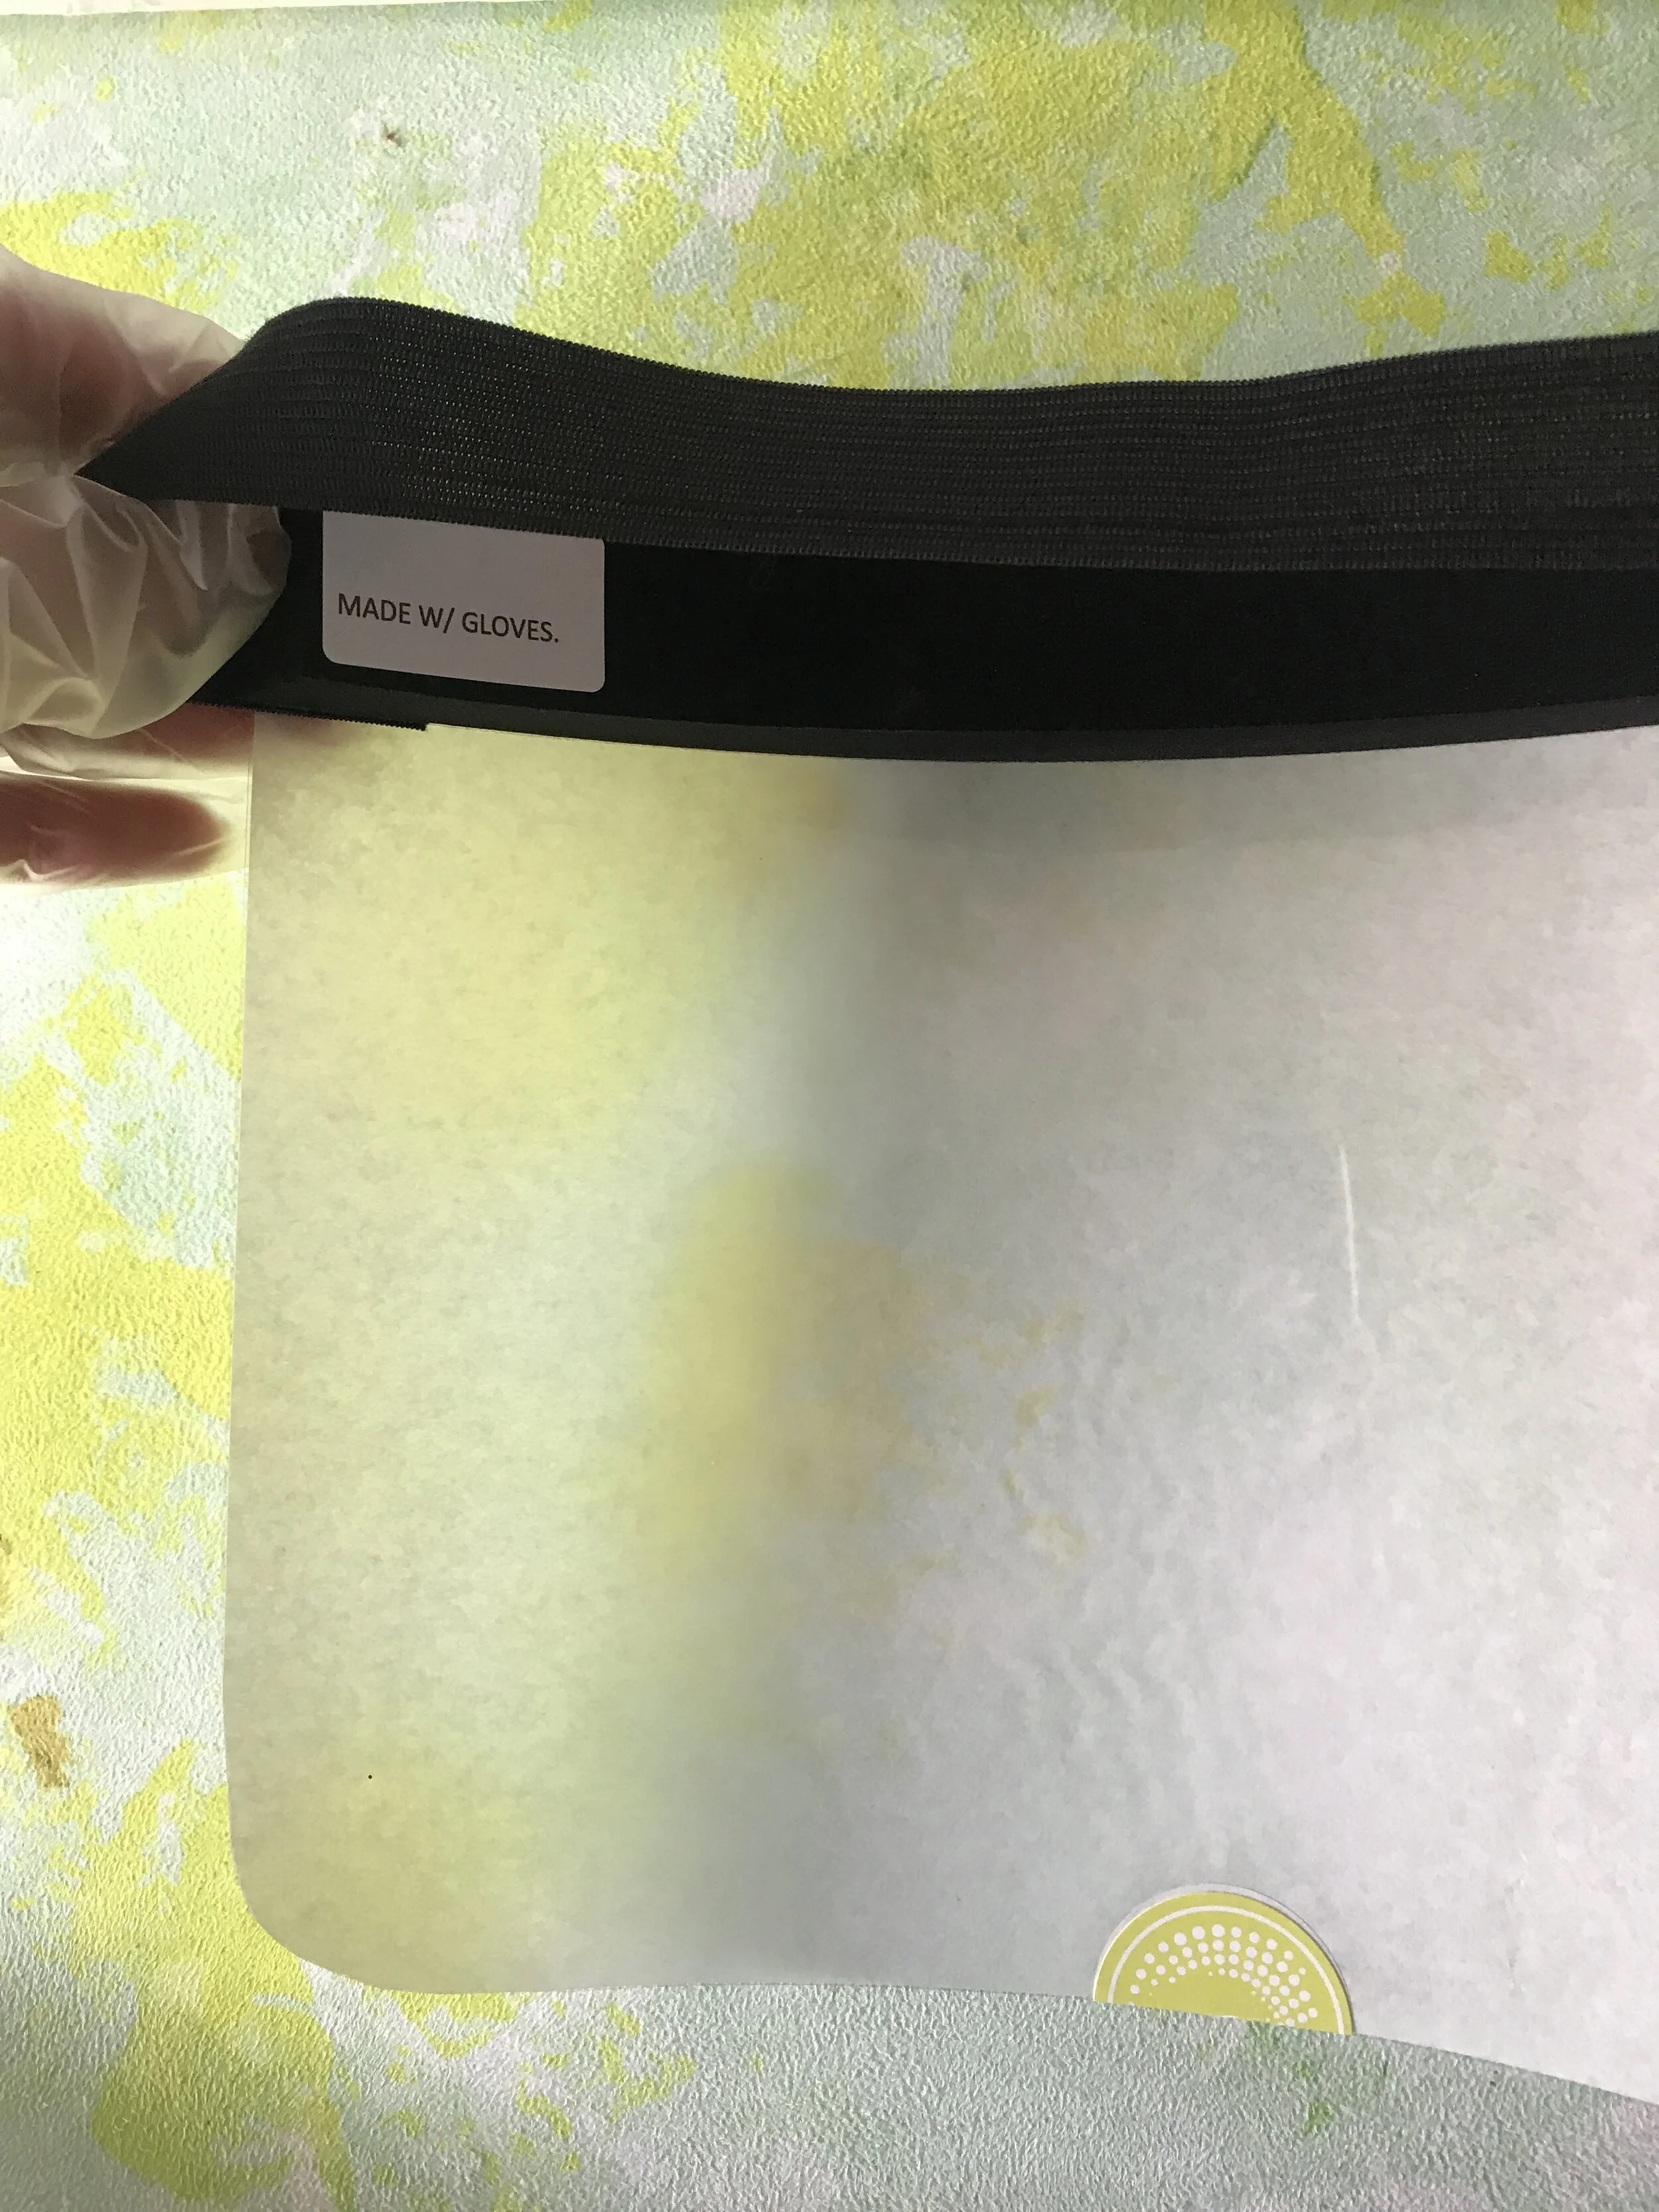
If you have some sticker labels, it would be great to mark each visor with the words ‘Made with Gloves’ just so the user knows they have been made in a clean environment. See example below, you can stick this to one end of the foam tape on the inside.
-
Once you have made your first visor, it is an idea to use this as your own protective visor to wear whilst making the rest of the batch.
WE ALSO ADDED A STICKER ON THE BOTTOM EDGE IN THE MIDDLE, FOR MARKING, BUT THIS IS NOT VERY NECESSARY.
BATCH DONE READY TO GO!
And that’s pretty much it! Happy visor making! When you have finished your batch, PLS contact your local NHS doctors surgery as a first point of call, many currently have online forms you can fill in and they will come back to you. They have been great at directing where the visors are desperately needed in the NHS, your local pharmacy as well or check the Facebook group ‘Make NHS Visors Appeal’ for any call outs as well.
Below, Serena and Rob explain a little more in some great instructional videos! They have recently gone into the 3D printing way of making them, which look fantastic and have vastly larger production abilities, but cost quite a bit more, so if you are able to, please donate to their cause here.
If you have a 3D printer and would like to help, please reach out on the facebook group here #HELPFROMHOME.
Any donation can help them reach their goal. These DIY visors cost about £1.50 per mask to make, but if you are in financial difficulty or are facing tough times, we are all in this together, just sharing the story with friends and family and on social media with the facebook appeal would be a wonderful gift. This time too will pass.
Namaste x
To download a printable handy PDF - Please click link below


0 comments